Justification
There is something Zen about boot time optimization. Let's face it,
most of us don't reboot our Linux machines all that often. Yet shaving
off a second or two from boot process gives me certain type of
satisfaction.
Recent
post
on Google+ by Lukáš Zapletal made me try out bootchart for the
first time. Original post was about e4rat - a tool for defragmenting
ext4 partitions to optimize them for boot speed when using traditional
rotational media. I decided to have a look at my bootcharts and see
what can be done on my SSD based Gentoo system.
Bootchart Installation
I am not going to go into details. Just install from your
distribution repositories. Gentoo contains
app-benchmarks/bootchart2
in base portage tree, and
Gentoo wiki has all
the instructions you'll need.
First run
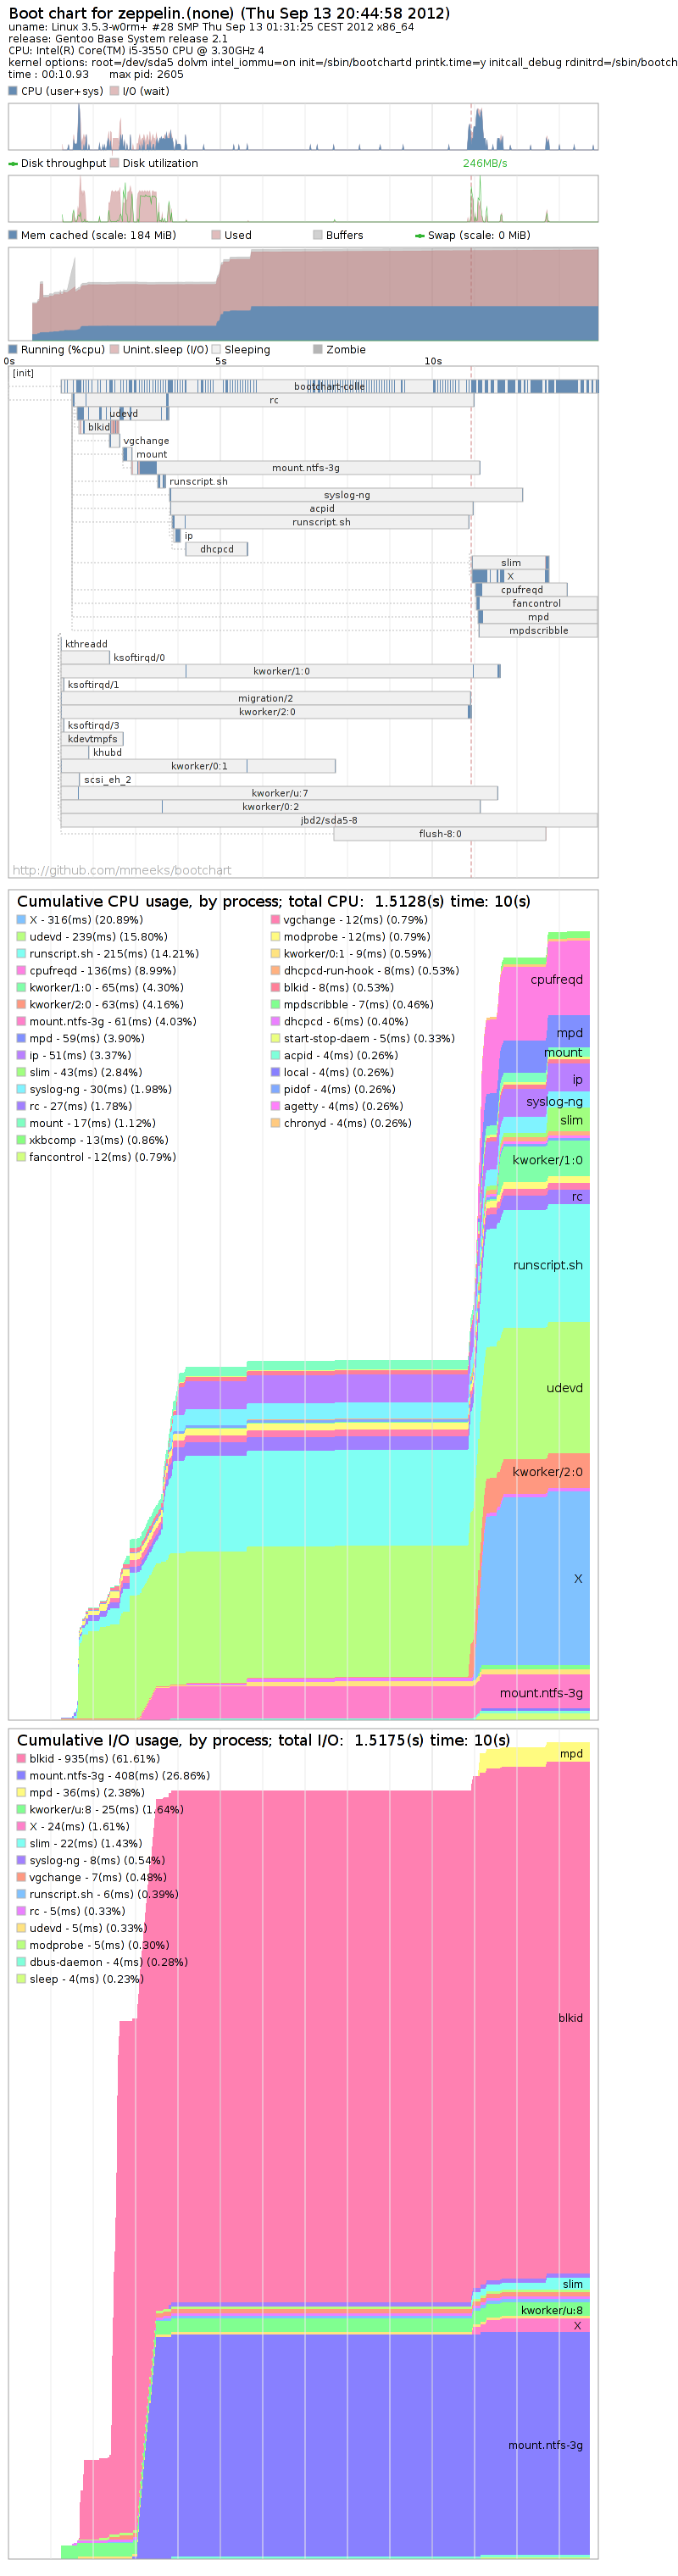
After I installed bootchart, my initial result was 11 seconds from
init to X server running and showing password prompt. Let's analyze the
Bootchart
(200kB png) a little bit. It looks like slim was waiting for
runscript.sh to finish. Not visible in the image, but that
is actually
net.eth0 script. In other words: network
configuration, dhcp. Since I have stable IP address in my local
network, I decided to stop using DHCP. For a simple Gentoo system
this can be achieved by editing
/etc/conf.d/net
(configuring IPv4 and IPv6 statically):
    $ cat /etc/conf.d/net
    config_eth0="A.B.C.D/24 2001:470:413b:0:2e2:d4ff:ff8d:ccd1/64"
    routes_eth0="default via A.B.C.1"
So how are we faring after making our IP static?
5
seconds! At this point I'd be willing to say mission
accomplished, but something told me there's more to do...
Let the fun begin
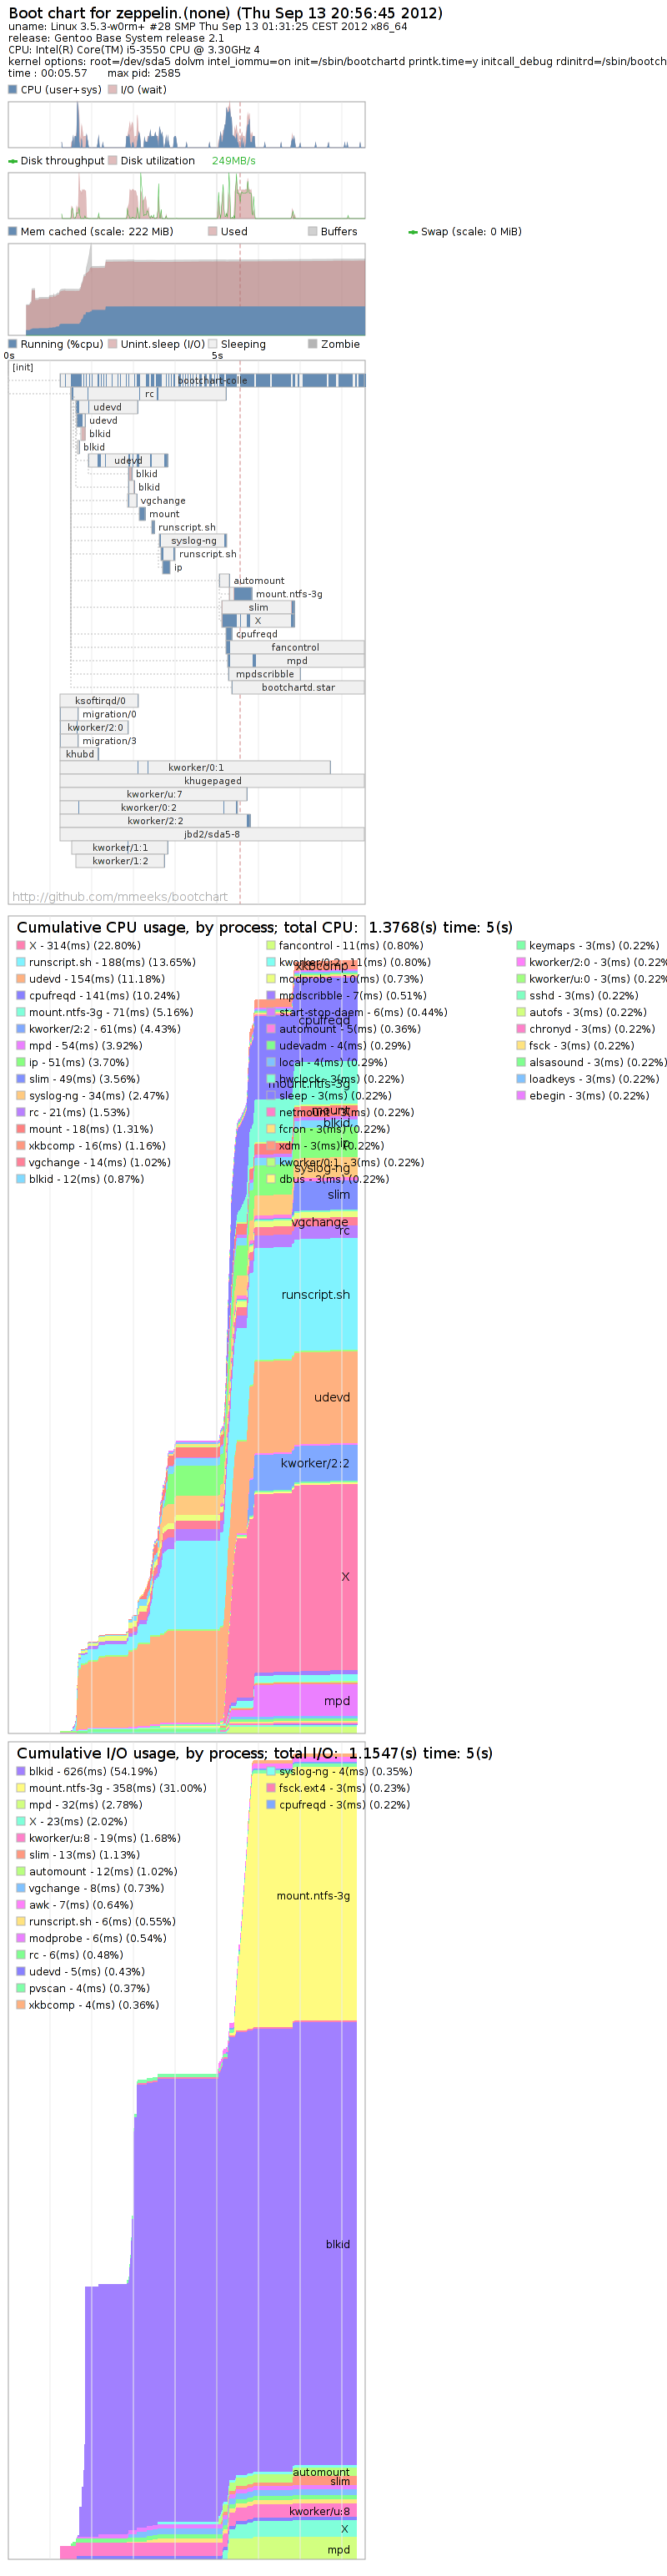
Looking at the second bootchart tells us one thing: xdm/slim is
waiting for my ntfs partition to get mounted. We should probably
avoid that!
What I decided to try was installing autofs and just mounting my
/shared-data partition when it's actually accessed. To my dismay, the
resulting
bootchart showed that the boot got even slower! (5.6
seconds). Time for the big guns baby!
Mini-optimizations
The problem with XDM seems to be that it is waiting for something. Let's have a look at
/etc/init.d/xdm
snippet:
depend() {
        need localmount xdm-setup

        # this should start as early as possible
        # we can't do 'before *' as that breaks it
        # (#139824) Start after ypbind and autofs for network authentication
        # (#145219 #180163) Could use lirc mouse as input device
        # (#70689 comment #92) Start after consolefont to avoid display corruption
        # (#291269) Start after quota, since some dm need readable home
        # (#390609) gdm-3 will fail when dbus is not running
        # (#366753) starting keymaps after X causes problems
        after bootmisc consolefont modules netmount
        after readahead-list ypbind autofs openvpn gpm lircmd
        after quota keymaps
        before alsasound

        # Start before X
        use consolekit dbus xfs
}
XDM seems to have a lot of dependencies. It is understandable
because distributions will always prefer correctness over speed
(hopefully).
We are running a simple desktop. No network authentication, no
heavyweight display manager or desktop environment like KDE or
GNOME. So what happends if we remove netmount and autofs from
requirements of xdm? After all we don't need them to start
slim.
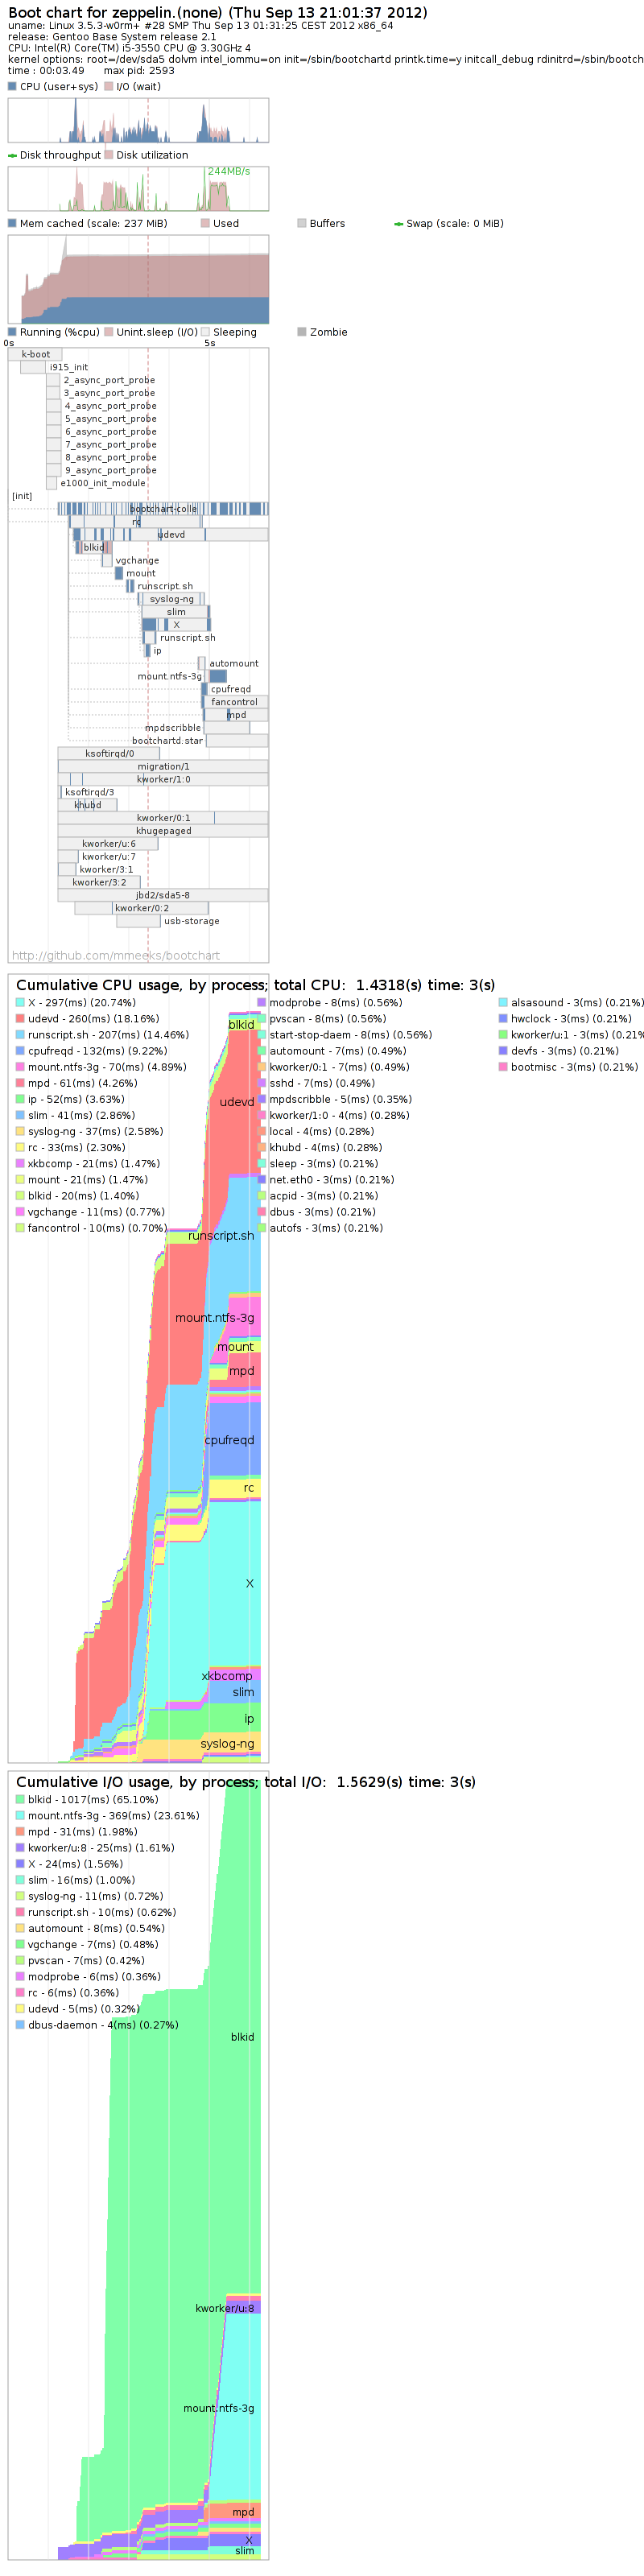
Final
bootchart is much more interesting. Roughly
3.5-4 seconds from
init to X!
Quo Vadis
I finished with that 3.5-4 second boot. But as the final bootchart
shows there's still room for improvement. List of things that could
probably be looked into:
- blkid takes too long. Perhaps we could avoid it completely?
- e1000 (network card) and i915 (graphics card) take
quite a while to initialize. Perhaps having e1000e as module and loading
it later during boot would be faster
- Not using LVM would speed things up, but I like its
advantages
- Avoiding udev could be useful as well for static system where
no USB devices are to be attached dynamically
- While we are at it, disabling USB completely would save
around 250ms as well

